Showing posts with label DIY Custom Kitchen Cabinets. Show all posts

Thursday, March 17, 2022

——— P&B’s Extreme House Makeover ——— .....Kitchen Renovation :: phase 2 :: continued.....

As promised, I am back to share the rest of Phase 2 of P&B’s Kitchen Renovation which was the installation of their new custom made upper cabinets. The last post covered the construction of the upper cabinets and the prep work needed in the kitchen ahead of installation. Once the soffit, cabinets and hood of the stove were all removed it was time to put up the next set of cabinets.
The cabinet pictured above was installed above the stove and will eventually have the hood underneath once the new range is installed. It is a nice sized cabinet although the venting will take up much of space inside. 
The cabinet on the interior wall is the largest upper unit. It has double doors on the section next to the doorway and the other end next to the wall is a single cupboard with one door. It will be a bit more difficult to reach but all storage space is considered premium.
In comparison to the old original cabinet, as seen on the left, the new version is both taller and wider. 
Next, the upper cabinets along the outside wall were hung. 
Crown molding was added at the top of the uppers and will also be added this week along the top of the Phase 1 cabinets on the opposite side of the kitchen. 
Progress is being made little by little. Once the appliances arrive it will be time for Phase 3 of P&B's Kitchen Renovation which will include installation of the lower cabinets and also some new lighting. In the meantime, more cabinets are under way back at the shop so that they are ready to go when everything gets here.

🍀 Happy St. Patricks Day!🍀

Tuesday, March 15, 2022

——— P&B’s Extreme House Makeover ——— …….….. Kitchen Renovation :: phase 2 ……..…

Dust has been flying around here as more cabinets have been under way for Phase 2 of P&B’s Kitchen Renovation. This time around it was all about the upper cabinets. The old cabinets were most likely the originals and had seen better days. They also were very small and did not make use of all the available wall space so Mr. Wonderful designed the new cabinets with that in mind.
He decided the best course of action was to remove the soffit on the far wall so he could take advantage of that space as well as the unused space above the old cabinets on the adjoining wall. That allowed him to  increase the height of the new cabinets which in turn would provide more storage space. To keep on schedule he went over to the house a couple days before installation to remove the old upper cabinets and the soffit which really helped in the long run. 
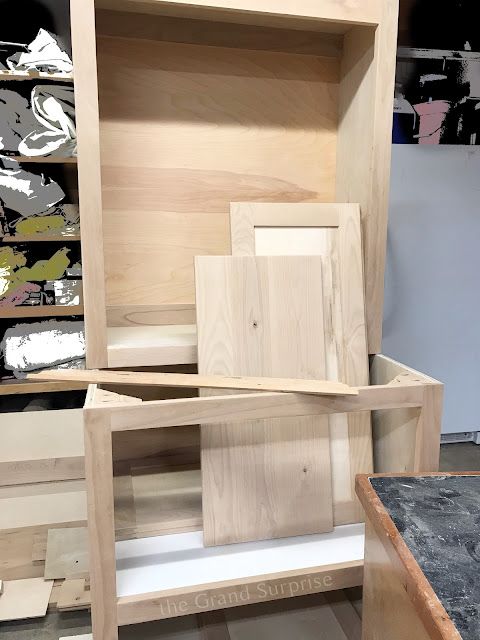
He’s a man with a plan so he wasted no time and started right in on the uppers as soon as he had Phase 1 completed. He had the boxes built in no time.
Then back to the paint booth. 
Doors and shelves were next. 
Finally, the drawer slides and hinges were added. 
Once they were all adjusted it was time to pack up and head over to install the new upper cabinets. Since there is so much to share I thought it would work better to do it in two posts so I will be back soon with the installation details of phase 2 and how the new cabinets are transforming P&B’s kitchen. 

Have a Great Day!

Tuesday, February 15, 2022

——— P&B’s Extreme House Makeover ——— …….….. Kitchen Renovation :: phase 1 ……..….

It has been a whirlwind of activity recently with HS basketball season in full swing and projects continuing in the shop. If Mr. Wonderful isn’t refereeing a game he is usually building things. And, as it is with most shop work around here, there is sawdust everywhere which is a sure sign that wonderful things are being created.
P&B’s Extreme House Makeover has now moved into a new phase which is focussed on the Kitchen. After a little brainstorming the kitchen in their new house was reimagined. What was originally a small one wall galley style kitchen with only a few rather small retro style cabinets and  some old appliances is now in the process of being enlarged and updated from floor to ceiling. It did not take long for the kitchen plans to be drawn up and then homeowner approved which kept the projects moving without interruption. 
Before the kitchen renovation could begin though, the new floors needed to be installed and it was also decided that the interior doorway to the kitchen needed to be moved at that same time to accommodate the refrigerator which was currently homeless.
As far as we could tell there had never been a truly designated space for a refrigerator so it appeared that the choice over all those years was limited to one of two walls that each had an outlet. That simply would not work going forward so the new plan for P&B’s kitchen included a wonderful custom home for the refrigerator along with plumbing for the ice-maker. 
However, the original interior wall was only 12” deep with a small narrow 12” cabinet at the end which did not provide much in the way of storage and definitely not enough room for the frig so it was agreed that the entrance had to be moved. During DEMO, the little old cabinet was removed and repurposed in the garage. The doorway was then extended approximately 14” for a total length of 26” to accommodate the refrigerator and some standard size cabinets.
The new entrance created a standard sized space along the interior wall for the refrigerator as well as a large, deep pantry and additional cabinets above the frig and more on the opposite side.
The new doorway was then framed in and also arched at the top to give it some character which was a nice touch. Kudo’s to Mr. Wonderful for that idea too. The electrical lines were also moved, switches and outlets were added and then the new floor was laid. The refrigerator will now finally have a permanent home and plumbing will be added so that the never ever been used ice~maker will finally be functional.
In the meantime, custom made cabinets were in the works. Our carpenter/cabinet maker {aka: Mr. Wonderful} suggested that the kitchen renovation be executed in three phases beginning on the interior wall side which would now include the refrigerator.  Of course we all agreed with that.
In fact, he had the first set of cabinets in production before the floors were even finished.
Once they were all assembled it was time for paint.
It took several coats for good coverage. 
Then the hardware was added.
Slides for the drawers, 
as well as hinges for the doors.
 And last but not least, holes were drilled for the adjustable shelves.
The first set of cabinets were ready to be delivered.
The pantry was installed first. Once that was secure the cabinet that frames the refrigerator was next. The top back was trimmed first so the cabinet could be tilted into place.
The refrigerator was moved back and fit perfectly in the new space. 
Last but not least, the upper and lower cabinets on the end were installed. An outlet and light switch were also added for convenience. A temporary counter top was made and attached to hold P&B over until they are ready to order and install the permanent counters which they are still deciding on along with their sink and range. 
Once all the upper cabinets have been installed the crown molding will be added. Base molding will also be added once all the base cabinets are in.
You can see what a difference it made to move the interior doorway so that standard depth cabinets would fit as well as the refrigerator. These Phase 1 cabinets alone provide more storage than all the original cabinets combined which was the goal. Now on to Phase 2: Upper Cabinets on the exterior side of the kitchen. I will be back soon to share more of P&B’s big kitchen renovation.

Happy Wednesday!

Friday, March 25, 2016

J & C's Kitchen Makeover ~ PART 7: Glass Cabinet

The DIY kitchen makeover is almost finished!

This is the last cabinet
and it was installed
on Wednesday. 
The part that amazes me most about installing this cabinet is that my hubby lifted, leveled and screwed it in all by himself. That in and of itself is hard to believe and, on top of that, no broken glass.
He's our hero!
Now all that is left to be finished is attaching these cute door knobs, 
a little trim work, the under cabinet lighting and the lights inside the glass cabinet. J & C's kitchen should be finished soon!

Have a wonderful Friday!

Saturday, January 30, 2016

J & C's Kitchen Makeover ~ PART 6: Tile & Flooring

Our DIY Kitchen Makeover
is in the
home stretch!
This past week was spent finishing up the tiling.
The floors, which look like wood planks, are actually ceramic tiles so, needless to say, there was a lot of grout work required between both the back splash and the floor. 
The flooring extends into the breakfast nook and also down the hall leading to the garage and in the downstairs bathroom.  
It's beginning to take shape! 
This weekend the grout will be sealed and once it is dry the appliances can be moved back in place. 
The doors to the upper cabinets will also be added this weekend and hopefully the door knobs and drawer pulls although J & C are having a hard time finding exactly what they are looking for. Once they decide on the hardware though it won't take long to add.

There is one upper cabinet currently under construction which will have glass doors and shelves. It will go on the wall above the stand alone cabinet between the doorways. 

To see J & C's Kitchen Makeover from the start go here.

Have a great Saturday!
Related Posts Plugin for WordPress, Blogger...